|
|
|
Did you know
that you can easily correct Exposure, White
Balance, and more on any Jpeg from any digital
camera using the free Adobe Camera Raw
software (versions 4 & newer) for Windows or
Mac that's included with Photoshop Elements 5
and newer, Photoshop CS3 and newer, and all
versions of Photoshop Lightroom? Adobe Camera Raw
is easy to use, intuitive, instantly responsive
with its on-screen adjustment previews, and most
importantly, non-destructive with your original
Jpeg files. Camera Raw adjustments and
corrections are not "burned in" to the original
Jpegs, they are retained as tag files that
accompany and modify the original files when
they are opened into Photoshop. Similar to
working with Raw files, changes made to your
original Jpegs in Camera Raw can be undone and
returned to their original state at any time
thereafter, with the original Jpeg file
information remaining untouched. Because of
this, you can now consider your original
Jpegs to be like digital "negatives" for use as
a lifetime source for future post processing and
printing. With that in mind, it's a good idea to
have a long term cataloging plan before you copy
your original pictures from your memory cards to
your hard drive so you can easily find them in
the future. It's wise to make permanent backups
of your original files in another location (CD,
DVD, external hard drive, etc.) in case
something bad happens to your
computer. Prior to Camera
Raw version 4, Jpegs that needed White
Balance or Exposure work were difficult to
correct, requiring strong Photoshop skills and
time consuming work to get acceptable results.
Easy Exposure
& White Balance correction was the main
reason I switched from Jpeg to Raw back in 2001
when Nikon Capture 2 software was introduced
with its user friendly White Balance and
Exposure Compensation tools. Three years
later, my excitement about further industrywide
improvements to Raw conversion software
motivated me to publish a short web article
titled "Why
shoot Raw?". As time went on,
I continued shooting Raw because of the
technical processing advantages and the enhanced
quality of the images they provided, but I
missed the practical side of shooting Jpegs.
Dual format
shooting options became standard in later model
high-end cameras, providing both a Raw and Jpeg
file of the same picture. This gave me the
opportunity to enjoy the best of both worlds. I
could share, view, or print the Jpeg copies
right out of the camera anywhere & anytime,
and still have the Raw files for advanced post
processing. But dual format
also means fewer total pictures per memory card
because of the space taken by the additional
Jpeg files. And it takes considerably longer to
transfer the dual set of Raw plus Jpeg picture
files into a computer. So should you
shoot Raw? Jpeg? Or both?? If you want the
absolute best image quality your camera can
deliver, shoot Raw. If you prefer
the simplicity & ease of working with Jpegs,
Adobe Camera Raw can now give you nearly all of
the technical processing abilities of a Raw
file. If your camera
can shoot Raw plus Jpeg at the same time, do it.
Even if you don't want to work with Raw files
now, save them for the possibility that one day
you might make the change. Your experience
working with Jpegs in Camera Raw will make it
easy. And then you can go back to your old photo
archives, dig out the Raw versions, and make
your favorite pictures even better!
How to open a
Jpeg, Tiff, or Raw file into Adobe Camera Raw
with Photoshop Elements (version 5 or newer) or
the full version of Photoshop (version CS3 or
newer)
Photoshop and
Photoshop Elements have three Camera Raw control
tabs in common. Photoshop
Elements is limited to just these three.
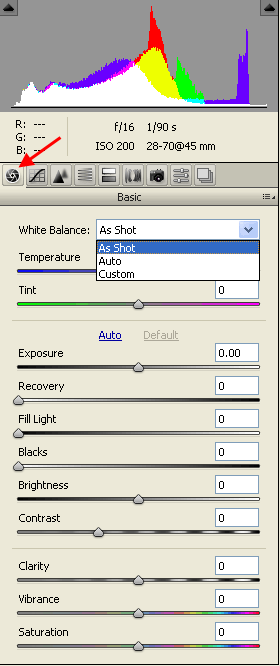
Basic This
is where you'll find White Balance,
Exposure, and other basic tone
adjustments. For
Jpegs, the available White Balance
choices are As Shot, Auto, and Custom.
Auto and Custom provide a broad range
of correction, likely all you'll ever
need. For Raw
images, the available White Balance
choices are Daylight, Cloudy, Shade,
Tungsten, Fluorescent, and Flash. You
can also choose As Shot, Auto, and
Custom. All of
the following adjustments can be
applied to either Jpeg or Raw
files. The
Temperature slider warms or
cools the White Balance. The
Tint slider can be used to
neutralize a green or magenta color
cast. Clicking
on Auto analyzes the camera
image and makes automatic adjustments
to Exposure, Recovery, Fill Light,
Blacks, Brightness, and Contrast.
Clicking on Default returns all
values to zero. These values can also
be individually adjusted. The
Exposure tool is used to correct
under or over exposure. The
Recovery slider is used to
restore details in
highlights. The
Fill Light slider helps recover
details from the shadows. The
Blacks slider darkens the
blacks, especially in the
shadows. The
Brightness slider lightens or
darkens the whole picture, but tends to
wash out or muddy up the darker tones.
Use sparingly or never. The
Contrast slider adds or reduces
image contrast, especially in the
midtones. The
Clarity slider is perhaps Camera
Raw's best feature. Plus settings add a
feeling of depth and will clean up hazy
looking pictures. Minus settings smooth
out harshness in shadow details,
especially useful for improving facial
skin tones. The
Vibrance slider adds or
subtracts saturation with a more
natural look than traditional
Saturation adjustments The
Saturation slider? Use the
Vibrance slider instead to retain a
more natural looking saturation or
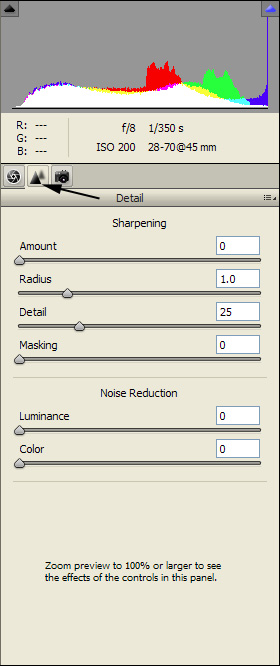
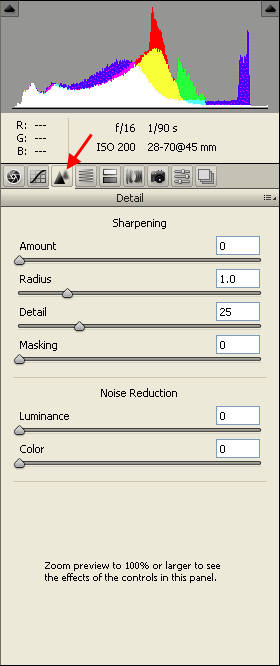
desaturation. Detail Sharpening
and Noise Reduction Sharpening For
Jpegs, the in-camera sharpening is
embedded when imported into Camera Raw.
Any sharpening done in Camera Raw will
be in addition to what was already
preset in the camera. For Raw
images, in-camera sharpening settings
are ignored when imported into Camera
Raw. All sharpening is done to a
zero-sharpened file. All
adjustments can be applied to either
Jpeg or Raw files. The
Amount slider adjusts edge
definition. Higher values increase
sharpening. A value of zero turns off
sharpening. The
Radius slider adjusts the size
of the details that sharpening is
applied to. The
Detail slider adjusts how much
information is sharpened in the image
and how much the sharpening process
emphasizes edges. The
Masking slider provides an edge
mask. With a setting of zero,
everything in the image receives the
same amount of sharpening. With a
setting of 100, sharpening is limited
to only those areas near the strongest
edges. Tip:
Zoom to 100% view and press the Alt key
(Windows) or the Option key (Mac) while
dragging any of the above sharpening
sliders to see the effect of the
adjustments. You must be zoomed to
100% for this to be
seen! Noise
Reduction The
Luminance slider is used to
reduce high ISO graininess. Use with
restraint, because it can also blur
fine details. The
Color slider is used to reduce
high ISO color speckles. Camera
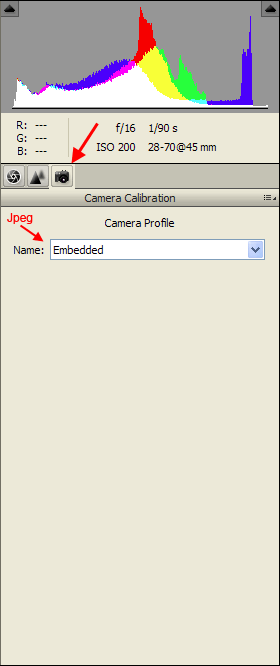
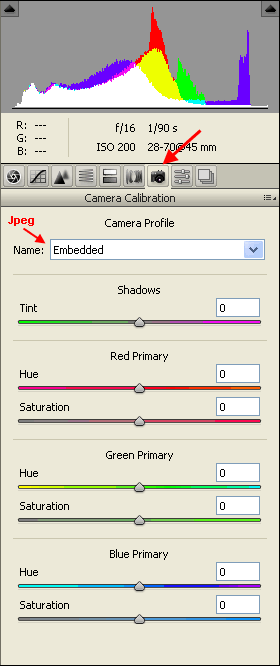
Calibration Camera
Profile The
Jpeg camera color profile is embedded
and cannot be changed from the profile
you had your camera set to when the
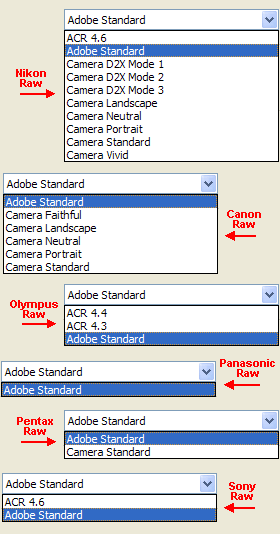
picture was taken. For Raw
images, the Camera Profile
drop-down box allows you to change
color profiles. For Nikon and Canon Raw
files, you can use one or more of Adobe
profiles, or you can select from a
variety of additional profiles that
emulate the in-camera color modes for
your particular camera. Other camera
brands have limited profile
choices. Note
that there are no
slider adjustments in
the Camera
Calibration tab with
the Photoshop
Elements version of
Camera Raw.
The
full version of
Photoshop has
additional adjustment
features in the
Camera Calibration
tab.
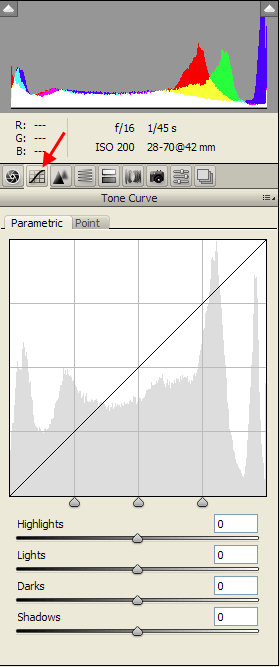
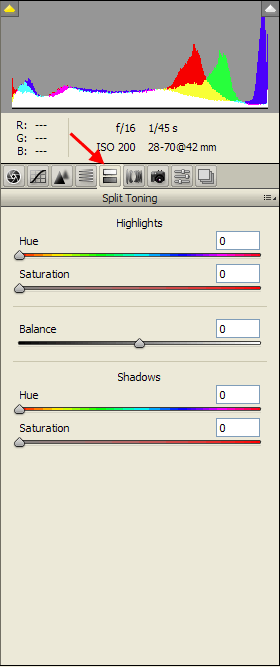
The
full version of Photoshop has nine Camera Raw
control tabs. Except
as noted in the previous section under
Basics and Details, all
controls, features, and adjustments
apply to either Jpeg or Raw
files. *There
are additional adjustment features
available in the Camera Calibration
control tab with the full version of
Photoshop.
One
of the things I like best about using
Camera Raw is that all the controls and
adjustments are easy to find, they're
right there in front of you all the
time, and they all operate the same
way. No
need to search and navigate through a
maze of menu bars like you have to do
in Photoshop or Photoshop Elements.
Notice
the added Camera Calibration
slider adjustments with the
full version of Photoshop
compared to Photoshop
Elements. As with
Photoshop Elements, the Jpeg camera
color output profile is embedded and
cannot be changed from the Profile you
had your camera set to when the picture
was taken. For Raw
images, the Camera Profile
drop-down box allows you to change
color profiles. For Nikon and Canon Raw
files, you can use one or more of Adobe
profiles, or choose from a variety of
additional profiles that emulate the
in-camera color modes for your
particular camera. Other camera brands
have limited profile
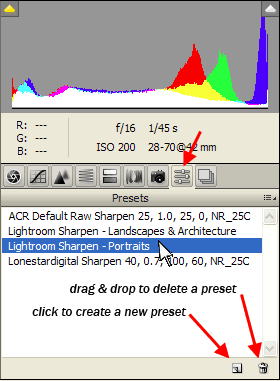
choices. Presets
allow you to assign reference names and
save any or all of the Camera Raw
settings in a given picture. You can
then use Presets to instantly apply the
same settings to any other picture.
Presets are one-click solutions for
things like favorite sharpening
methods, black & white or sepia
toning techniques, or giving all the
individual pictures in a group the same
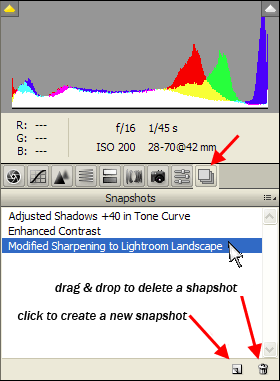
look. Snapshots
allow you to assign reference names and
save the different stages of your
Camera Raw editing progression. You can
then toggle back & forth through
your snapshots and easily compare the
results of the changes you have made.
Snapshots are especially useful for
those "I think that picture might have
actually looked better a few minutes
ago?" situations.
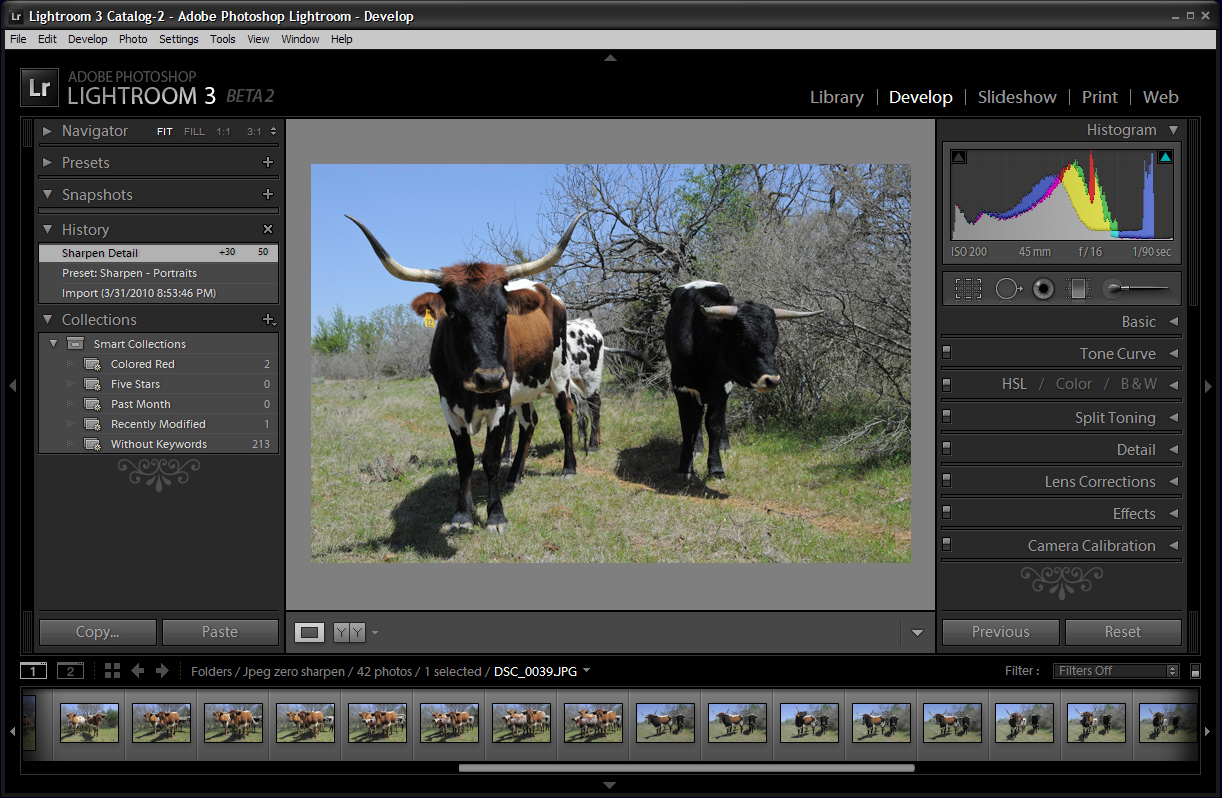
Camera Raw
and Photoshop Lightroom. It looks very
different, but Lightroom has the same Camera Raw
options for Jpeg or Raw files as the full
version of Adobe Photoshop, plus streamlined
batch processing (called "Sync") and other
unique features. Below: Screenshot of Camera Raw
controls in Lightroom 3 Now that so
much can be done with a Jpeg, why shoot Raw at
all?
|