Best
viewed at 1024 x 768 or greater screen resolution,
16 bit color or better. All content &
photographs copyrighted, all rights reserved.

Using Quantum Mechanic Pro
(Assuming you have Adobe Photoshop and Quantum Mechanic Pro installed.)
Open the picture in Adobe Photoshop.
Click on Filter / Camera Bits / Quantum Mechanic Pro...

The Quantum Mechanic Pro work screen will pop up.

Inspect the Blue Chrominance preview for noise patterns.
(The "Preview" dropdown choice box is at the bottom center of the work screen.)

Adjust the Blue Chrominance Radius slider until the noise goes away.

Inspect the Red Chrominance preview for noise patterns.

Adjust the Red Chrominance Radius slider until the noise goes away.
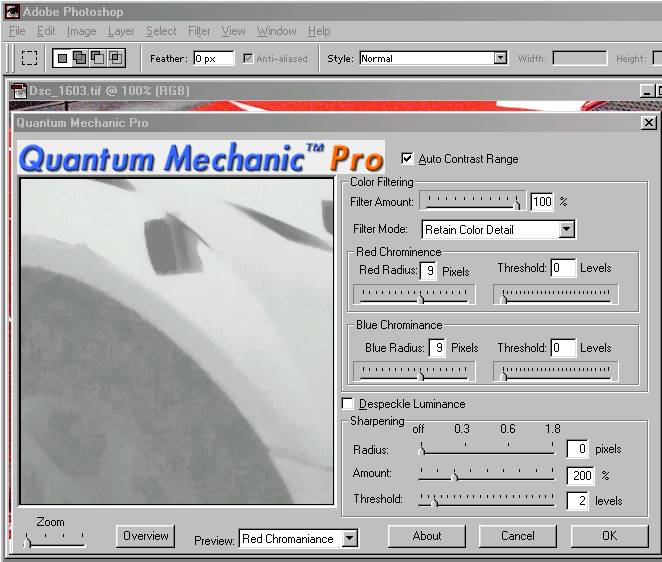
Inspect the Luminance preview for noise patterns.

Click the checkbox next to "Despeckle Luminance" and watch the preview screen for the effects.
It is likely to make only a minor gain in image quality & clarity compared to the Red & Blue Chrominance adjustments, but every bit counts.
You may
or may not want to apply sharpening here... In this case I
clicked the sharpening radius
slider to "off" because it looked better without it. (Your
mileage may vary.)
This is the last step in the process.

Where can you find Quantum Mechanic Pro?
Purchase it online and / or download a fully functioning trial version directly from Camerabits.com