|
|
|
Seldom-used
tool works without adversely affecting image
sharpness. Below: ISO 1600
Nikon D1H action shot of a top fuel dragster at
300+ miles per hour during a nighttime
qualifying session. A great picture, but look at
the high ISO noise & grain, especially in
the shadows. What does Smart
Blur do? It smoothes out grain and noise
patterns The
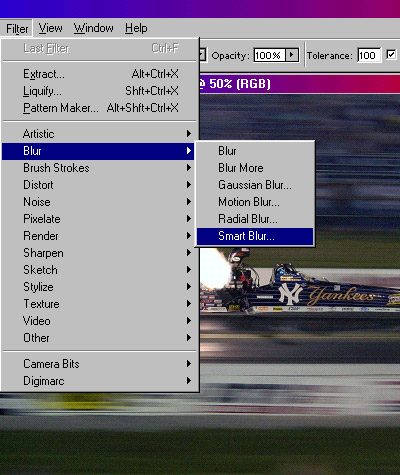
Smart Blur filter is located in Adobe
Photoshop's menu bar under
Filter / Blur / Smart
Blur... Operational
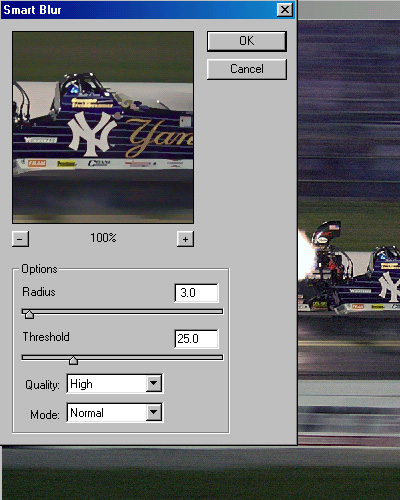
notes: The
default values for the Smart Blur
filter are Radius 3.0, Threshold 25.0,
Quality Low, and Mode
Normal. I vary
my Radius settings anywhere between 0.5
and 3.0, and seldom (if ever) go above
or below this range. The live preview
screen in the Smart Blur box shows the
effect as you change the radius values
to suit your taste for the picture at
hand. I
rarely modify the default Threshold
value, I've found that the default
value of 25 seems to be perfect in most
cases. I use
High Quality rather than the default
Low setting. High Quality seems to
produce a cleaner, smoother looking
image. And I
leave the Mode set at
Normal. Below: After
Smart Blur.
More notes:
Smart Blur can
be really good for correcting ruddy,
blotchy skin tones in high ISO pictures. Low
radius values (0.5 to 0.8) will be necessary to
retain natural looking skin textures. If closeup fine
detail appears degraded after applying the Smart
Blur filter, lower threshold values to around 15
or so. Smart Blur is
not always the be-all, end-all, world's best
noise reduction filter. But for some pictures,
nothing works better and easier. It's simply
another useful option. |

.jpg)


